This craft is NOT something you would do with kids due to the tools you are using to design your wooden box.
What you will need:
- A wooden box of your liking
- A pencil
- A wood burner
You can find a wooden box all around at any store. I picked one from Michael’s Arts and Craft Store. I picked a small little box to hold earrings in my purse because I’m really good at losing them.
Finding a wood burner is really easy, you can find them at Michael’s Arts and Craft Store as well, they range from 12.99-16.99.
So what you wanna do is sketch out the design you would like to put on your box, unless you’re super talented and have the ability to free hand it! I do not have that talent so I sketched out what I wanted to do. I also advice sketching out what you would like to do first because the wood burner does get extremely hot and if it gets too hot you’ll have to stop what you’re doing and come back to it when it’s cooled down a bit.
To start, plug in your wood burner and let it heat up. When you think it’s hot enough take a scrap piece of wood and test it to see if it has the ability to burn the wood yet. When using this tool you are literally burning wood into the design you are achieving.
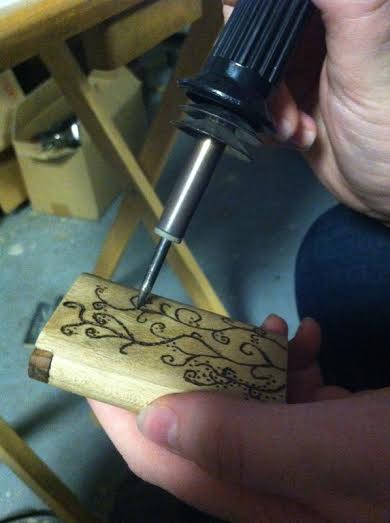
When you go to use the wood burner you want to hold the point of your tool on the wood and let it burn the wood and slowly move it across the surface into your design. It is a slow process but it will come naturally to you. The harder you press and the slower you go, the thicker the line will be.
With the wood burner you can buy different tips so that you can create the look you want. The tips range from a sharper tip to a more round, bigger tip.
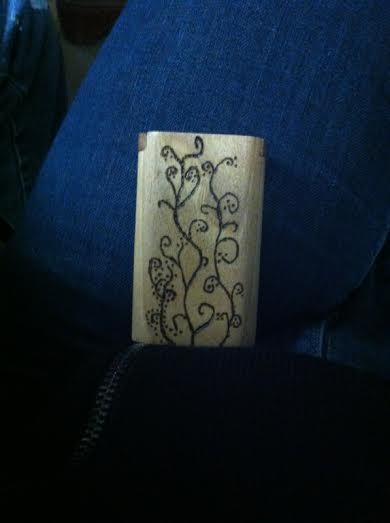
When you’re done you will have a really awesome and natural looking box.
You can also use a wood burner to create signs. My boyfriend made really awesome signs for his sisters wedding over the summer and was able to do so from using a wider and rounder tip with the wood burner. So have fun with this!
Here’s the finished product:
Remember to be safe and don’t burn yourself!