Archive | November 2014

Redone paddle. Last one I promise!

So I have finally come to an end of crafting for my big. We were supposed to be initiated on Sunday of November 9th but due to some mishaps with room scheduling we didn’t get initiated until yesterday, November 16th. So that gave me a whole week to fix my paddle from its hot glittery mess to something I felt much more confident with.

I did the procedure I talked about in the last post but this time it was more intense because there was so much glitter involved.

So here is what you will need if you ever need to bring your paddle up from a glittery grave:

  1. A paint scraper
  2. Sandpaper (I used 80 grade)
  3. paint

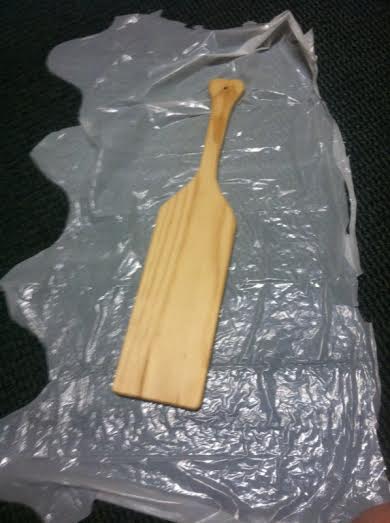
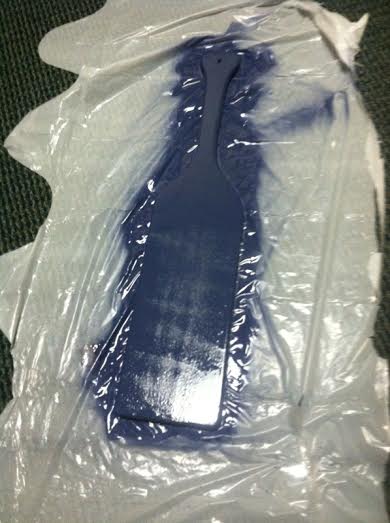
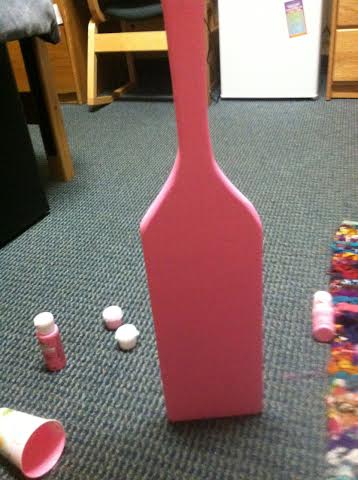
First I used the paint scraper and scratched up and down really quick and hard to remove as much glitter and paint as I could. Once I got as much as I could off I started to sandpaper it. I used 80 grade because the sandpaper was rougher but because of this I had to do it lightly because my goal was to remove all the paint and glitter without damaging the wood. I tried my best but I did mess up the grain in the wood a bit causing some areas to look kind of fussy. Once most of the paint and glitter was removed I started to paint the paddle again. I used pink craft paint from Walmart that was only 50 cents! It worked really well and I was very happy with the color.

paddlefront

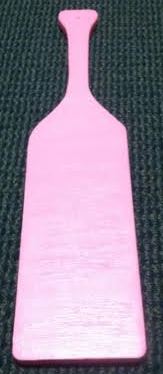
Once I was finished painting the front of the paddle and it had dried I moved on to the back of the paddle. With the back I decided to mix the pink I already had and white to make a nice light pink to add contrast to my paddle.

paddleback

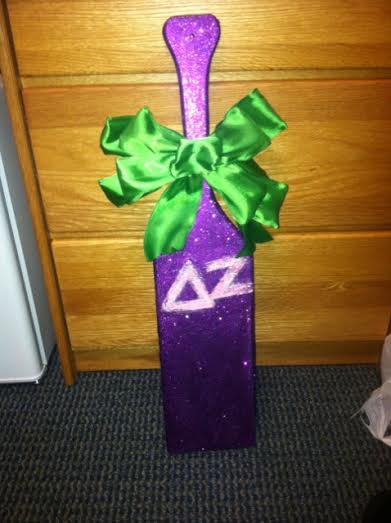
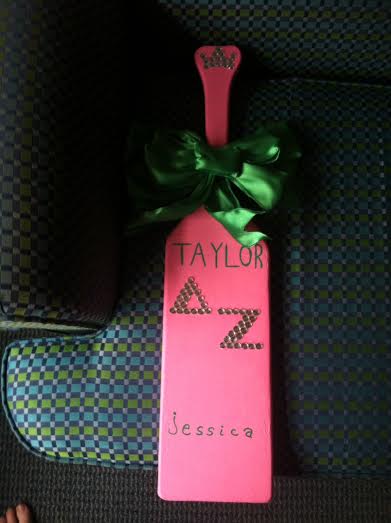
When my base coat was completely done and dry I took jewels and glued them onto my paddle with Mod Podge to form into the Greek letters DZ (delta zeta). After that I took a green paint pen and wrote out Taylor’s name in all capitals since shes big and then my name at the bottom in all lowercase letters since I’m little. Then I moved to the top of the paddle and messed around with the jewels until I was able to form a pretty tiara since my family is called “The Royal Family.” Once the front was dry and finished I moved onto the back,

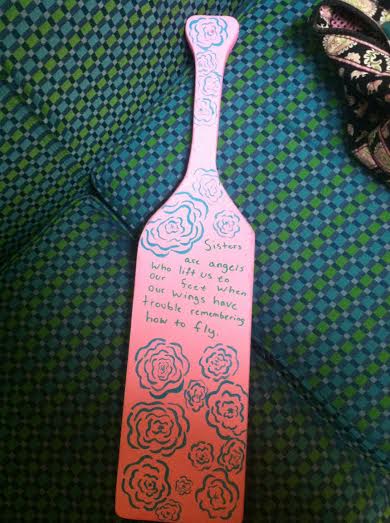
For the back I took a pencil and drew outlines of rose petals. It was like drawing those V birds you made when you were younger but looping the V’s down and out. I did that from outside in, getting smaller and smaller to look like roses.

flowers

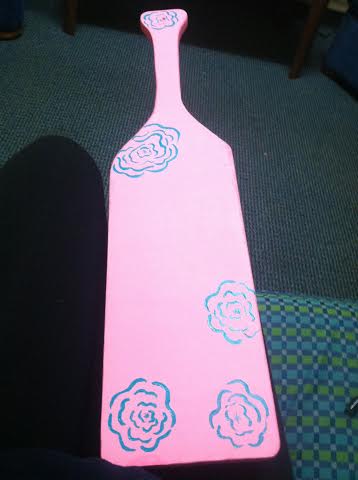
I then wrote the phrase “Sisters are angels who lift us to our feet when our wings have trouble remembering how to fly” with the green paint pen I used to write out our names. After that I filled empty space in with more roses!

When all the paint was nice and dry I added my bow to the paddle and then it was finished!

This was the final product:

paddlefrontdonepaddlebackdone

I was extremely happy with how everything turned out and Taylor loved everything I made for her (I posted all the crafts). I was really happy when she asked me if I stenciled the roses on too(:

This has been the long process of my sorority new member period and crafts and I would like to say thank you to those have been following me through this process! I hope y’all have enjoyed the Big and Little crafts!


This entry was posted on November 17, 2014. 1 Comment

Paint a frame

This craft is super fun. It took me awhile to start though because I had no clue what I should paint at all. I used acrylic paint and had a lot of fun once I decided what to do! I didn’t want to do writing because that is too difficult for me. I wanted to make it fun and something that would look nice with a picture in it!

I got the wooden frame at Walmart for 0.97 so that was pretty cool. Then I painted the background color onto the frame. I picked a pretty teal color. Once that dried I took a small paint brush and used like colors that would blend well with the background and did quick short strokes all around the frame. Once everything was filled in I took a bigger paint brush and worked on doing flower like things that didn’t look like typical flowers. It ended looking like this.

frajn

This entry was posted on November 16, 2014. 1 Comment

Space painting

Lately my life has been consumed with painting things for people. While I was busy painting things for my Big, I decided I could try and paint something for my boyfriend. I had a lot of fun with this because it wasn’t a planned craft, I just had an extra canvas.

First I spray painted the canvas navy to give it that dark spacey color. Once the spray paint was dry I started doing the outline of my planets. When I placed each planet where I liked them I painted the insides, trying to shade them as best I could to make it look better. I added some dots for stars. I used a yellow and white. I even tried to put in one of the dippers (not even close to correct on location or anything). I added a fancy star at the top and a rocket ship because what space painting is complete without a rocket ship? None! Once everything was dry I wrote a cute little saying over it(:

stars

After I gave it to him we decided to paint over everything with black light paint since his room has black lights. It was a lot of fun cause I made him something and then we worked on it together. I tried to take a picture of it glowing but it didn’t work out at all.

This entry was posted on November 16, 2014. 1 Comment

Paddle craft and sorority things

So I recently discovered that painting a paddle is the worst thing you will ever do in your life unless you’re just amazingly talented and go do awesome things with wood and paint. I am not one of those people. My goal for this post is to tell you my process on trying to decorate a wooden paddle.

woodpad

First I had to sand the darn thing which is messy and takes forever. You have to sand with the grain or you will just screw up the wood so after I realized that the hard way I was on a not so smooth ship to decorating my paddle.

Once my wood was sanded and smooth I spray painted my paddle a navy blue. My goal was to have it navy blue and paint pretty flowers on it but I successfully ruined the paint on my paddle. Lesson learned: you can’t expect to spray paint the front of the paddle, have it dry, and then spray paint the back without ruining it. Spray paint does this awesome thing where it drips underneath the paddle so when you go to lift it up, the paint rips off and sticks to the trash bag. So I ended up having to respray paint it. I let it dry again and then tried to add my design. I quickly realized that paint pens are the gracious gift of god but that my handwriting is not. So I ended up wiping the paint off and again ruining my paddles paint. I resprayed and messed up again but this time I messed up with glitter! So I ended up having to use rubbing alcohol and a paint scraper to chisel away my woes.

paddlespray(Before the epic screw up)

On my what felt like a millionth retry I listened to my roommates advice. I put modpodge down and then put purple glitter all over my paddle in a “I give up with anything else” attitude. Then I painted my sorority letters on paper, WHICH IS WAY EASIER THAN ON WOOD OR ANYTHING ELSE and then modpodged that onto my paddled. Then I added a bow to the neck of the paddle because bows fix any major screw ups. On the back I used the paint pen to write a sweet message to my big about how many times I redid her paddle and that she better love me anyways. (:

paddle done

I did do one thing successfully! I bought wooden letters to spell out BIG and painted them a very pretty purple and put polka-dots on them!

woodbig big purp bigdone


What did I learn during this whole process? Never in my life with I ever want to decorate a paddle but I might just do it now that I posses all this knowledge I have passed onto you(:

I also tried to paint a pretty canvas for my big but I learned that if you press too hard with a paint pen it will put a whole through your art work, causing you to give up and chuck it all in the trash with no hope for a return or better day in the crafting world.

This entry was posted on November 9, 2014. 1 Comment

Autumn crafts

I found a really awesome post on this blog about mod podging leaves to mason jars. The blogger said that they used fake leaves because it’s easier but real leaves work too! They also said that the craft comes to around $5 but that was not including mod podge.

What you will need:

  • Leaves
  • mason jar
  • mod podge
  • sponge brush
  • ribbon

So what you will need to do is go out and find some leaves! You can use real or fake leaves, it’s all up to you! When you have everything you need you just mod lodge the leaves onto the jar. You can glue them down and the put the mod podge over the leaves as a sealant. When you’re done add a ribbon to the top, around the neck of the mason jar.

The blogger I got this idea from said it’s best to make sure the mason jar is clean before you start anything as well, just to make sure the mod podge sticks!

You can use the jars to hold things, give as gifts, or put a tea light candle in them and have a pretty candle jar!

I personally like the idea of real leaves better than fake leaves because it’s more authentic and you are really capturing natures essence !

autumn leaves


I really liked this craft idea! I think it is a really nice and relaxing look and fall may or may not be my favorite season so this is a special plus 😛 It also reminded me of pressing flowers from when I was little! I really hope y’all enjoyed this crafting idea as much as I did!

This entry was posted on November 1, 2014. 1 Comment

Make an opaque glass painted ornament

This craft is super easy to do and fun for kids! You can find all the supply at Walmart or Target or basically anywhere.

What you’ll need:

  • clear glass ornaments
  • Craft paint of the color you like
  • Ribbon for hanging them

What you do is put paint in the ornament then roll and shake the paint around in the ornament. When the paint is evenly placed everywhere let it dry! You could also paint on the outside of the ornament or glue google eyes or puff balls or pipe cleaners to the ornament. This craft is super simple, easy, fun, and pretty mess free! This craft also leaves a lot of free room to run your creativity!

This entry was posted on November 1, 2014. 1 Comment